I had a recent question about how to remove all the unwanted content on an iPod. Kathy only wanted to have music on her iPod, now that she had both an iPhone and an iPad to work with, and she had decided now to leave her iPod attached to the stereo in the living room. Photos, videos, apps, contacts, etc., were taking up precious space, and she wanted them gone.
Really, all she needed was a signpost or two that showed her where to find the place she needed to be, and once she got there she was off and running. These instructions are essentially the same for iPads and iPhones, too.
Here is how to get to “that spot,” the content manager, so you can change what you have on your iPod/iPhone/iPad:
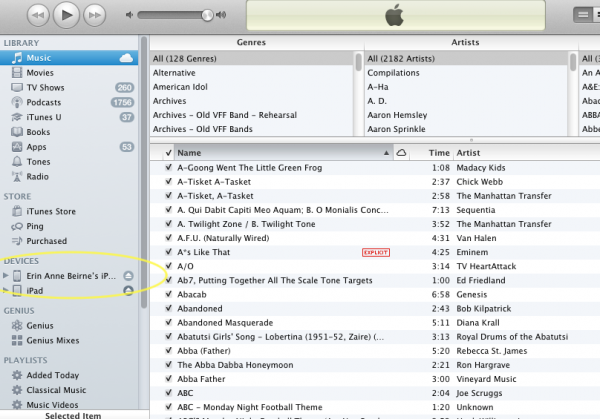
- Plug in your device, and simply wait for it to open automatically. (Most people have it set this way, but if nothing happens after a minute or so, your setting is probably changed to “do nothing.” No problem: Just open iTunes yourself in the way you would open any other application.) Watch the column on the left for when the name of your device loads in. Here, in this picture, the iPod doesn’t show up yet (yellow circle), so just hold tight for a moment or two…
- Here is the screenshot with the iPod now properly loaded and ready to manage:
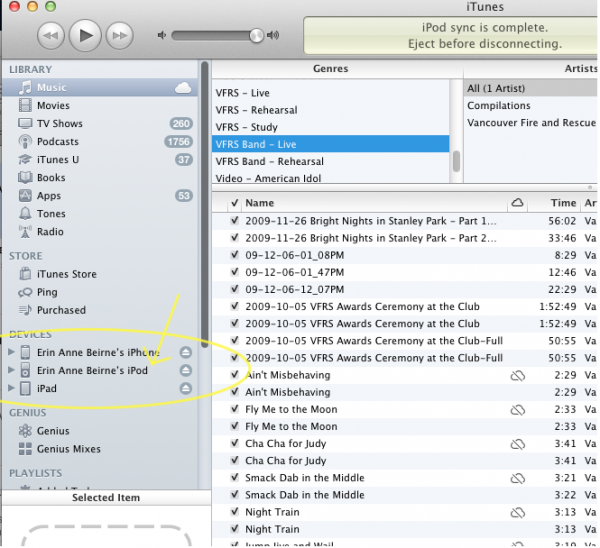
- Once you can see your iDevice has loaded, as above, click on the name of your iPod/iPhone/iPad to open the content manager, which looks like this:
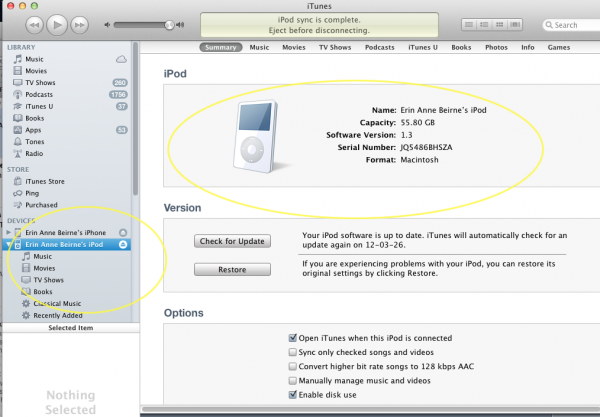
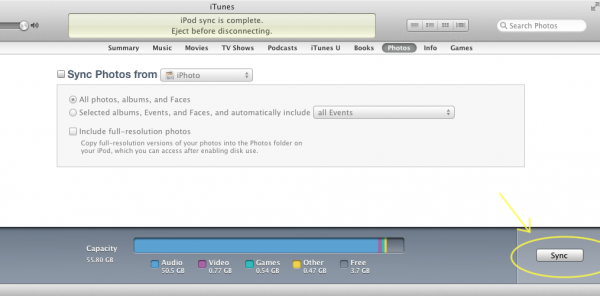
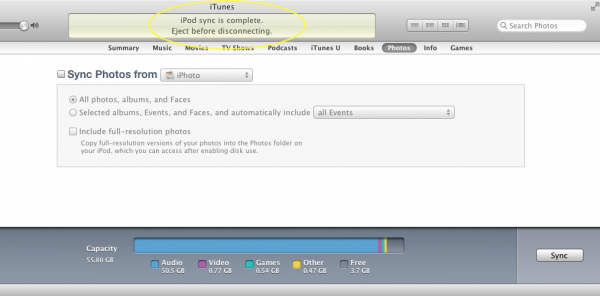
- Now that you’re here, just click on the menu tabs above the large yellow circle to manage the type of content you want to add or remove. Want to remove all your pictures, as I have done so that I can fit more music on my iPod? Click on the photo tab, and then un-check the Sync Photos button. It looks like this:

- When you are ready, click “Sync” (sometimes it shows up as “Apply”), and let your iTunes program make the changes on your iPod/iPhone/iPad. the button is in the bottom right corner, here:
- Let your equipment finish talking to each other, which you will know is done when you see a message similar to this in the window. Newer devices than my vintage iPod 60GB don’t always demand that you click the eject button; your iPhone 4 or 4S, and your iPad will simply say that it’s now safe to disconnect your device. Either way, it’s best to wait until the full sync process is finished or you’ll only have a job half-done, and you’ll have to start again next time. The message is here:
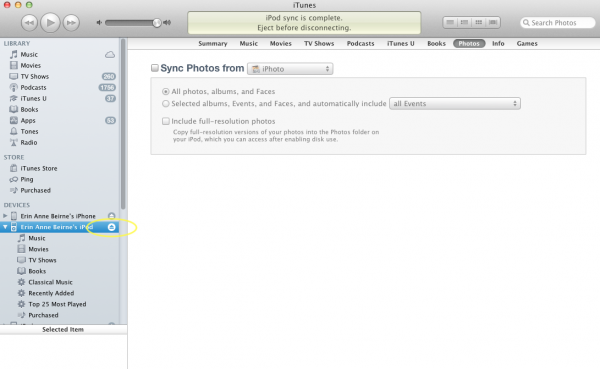
- Have a newer device? Just unplug it from your computer. You’ll know which you have by what it says in the window (Step 6). Does it say “Eject before disconnecting?” Then you have an older device, and you’ll need to take this one last step. Click on the eject button beside the name of your device (circled in yellow), then unplug it when your iPod tells you it’s ok (wait for the the flashing red circle in the window on your iPod to disappear and the “Do Not Disconnect” message to change to your regular iPod menu):
- Want to add something back in? Just follow these steps again, only make different decisions when you are in the content manager window (Step 4).
That’s all there is to it!
Enjoy!
ea/


Speak Your Mind